-40%
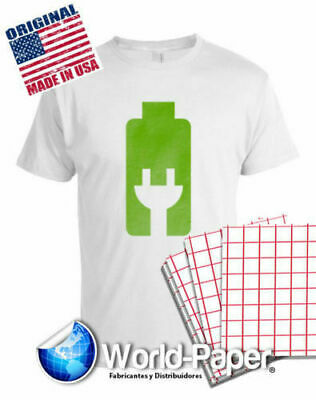
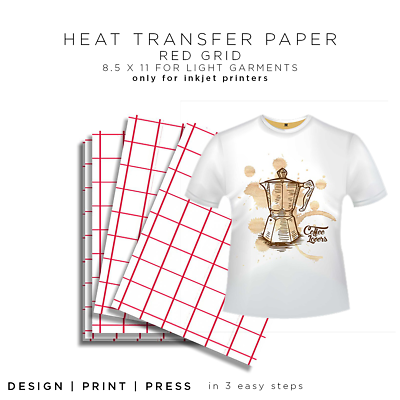
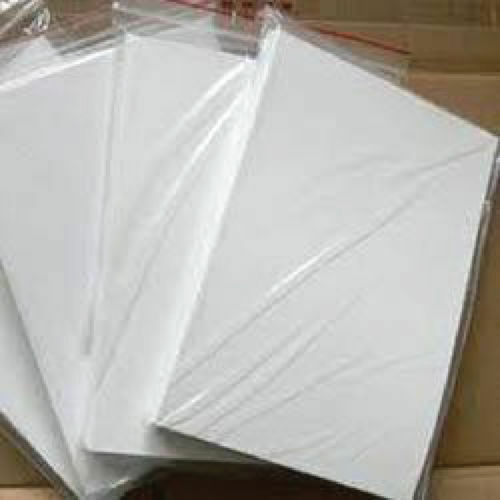
INKJET HEAT TRANSFER PAPER RED GRID LIGHT COLOR TSHIRTS - 8.5 x 11- 500 SHEETS
$ 100.31
- Description
- Size Guide
Description
WorldWide Fast DeliveryMENU
Home
New Arrivals
Ending Soon
Feedback
Contact Us
Home
Our Store
Feedback
Contact Us
Shop Categories
Heat Transfer Paper
Heat Transfer Vinyl
Heat Press Machines
Adhesive Vinyl
Bundles
Helpfull Links
Add to Favourite Seller
Ask Seller a Question
About Us
Contact Us
View Feedback
Visit Our eBay Store
Store Newsletter
Add my Shop to your Favorites and receive my email newsletters about new items and special promotions!
Subscribe
Fast Delivery
Secure Payments
INKJET HEAT TRANSFER PAPER RED GRID LIGHT COLOR TSHIRTS -
8.5 x 11- 500 SHEETS
Or Choose Different Paper Type Qty / Size
Description
World Paper Digital Trasnfer Paper
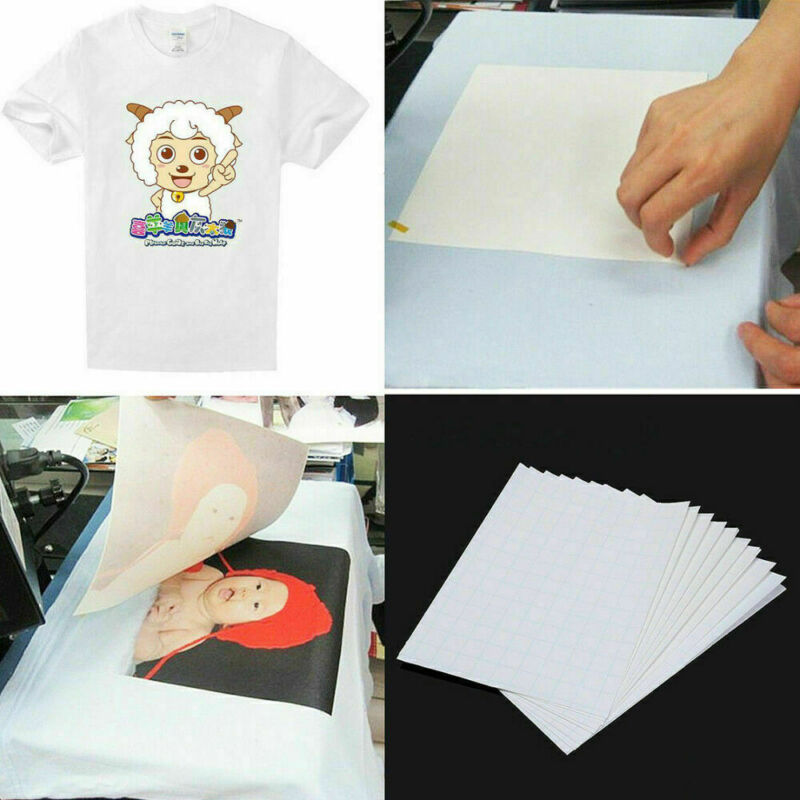
The customization of garments and other products is a growing trend. Digital Transfer Paper is specially engineered paper that can be digitally printed using inkjet or
laser printers and can be used to transfer those images to a variety of garments, fabrics and other hard surfaces by the use of heat and pressure
-Excellent quality with good color reproduction.
-Durable art and messages that will withstand many wash cycles.
-Hand and aesthetics that rival screen printing.
-Ability to print on a wide range of substrates including; cotton, cotton blends, synthetics, denim, leather, -mugs, tiles, hats, wood, acrylics and glass substrates among others.
-Low cost of entry.
Laser Heat Transfer Paper
World-Paper's Laser Digital Transfer Paper makes it possible to create and sell personalized products including t-shirts, mugs, mouse pads, canvas and leather using your black and color toner printers.
Inkjet Heat Transfer Paper
World-Paper's inkjet printable digital transfer papers are versatile so that we can cover all of your needs with just a few different products.
Instructions
rED l
bROWN L
BLUE L
Glow N Dark
Redgrid
-YELLOW L- PURPLE L
ITEMS YOU WILL NEED
• Black or dark colored 100%Cotton Fabric. The use of cotton/poly blend fabric is not recommended, the dyes react differently and can absorb into the transfer. For best results, use fabric with tight weave.
• Heat Press
• Parchment paper
• After opening the sealed package of transfer paper, store the unused portion in a resealable poly bag in a flat, cool, dry area.
STEP ONE – PRINTING YOUR IMAGE
1) Bring paper to room temperature before printing.
2) DO NOT mirror or flip image prior to printing. Always pay close attention to printing.
3) Load paper so it will print on the unlined side of paper. In most copiers and printers, transfer paper can be fed from the cassette (automatic) tray as well as the bypass (manual) tray. If using the cassette tray, remove other paper from the drawer before placing the transfer paper in the copier. Fan the paper well before placing it in the cassette, this helps to minimize the static.
4) Printer settings: Settings will vary somewhat depending on the brand of copier or printer that is used. We recommend using the PLAIN PAPER setting. If the toner has not fused well then choose the next paper setting up one increment at a time. Each setting away from PLAIN PAPER slows the paper down as it goes across the fuser, choosing a setting at the other end of the spectrum could cause the paper to jam or melt if it is too hot for the paper. Find the right setting for your machine to insure great results. **Recommended print settings for these brands ONLY: HP – Print Mode: Extra Heavy OKI – Print Mode: Heavy
STEP TWO – TRANSFERRING YOUR IMAGE HEAT PRESS
1) Preheat press to 375º F.
2) Press garment for 3-5 seconds to release moisture and remove wrinkles.
3) Trim off the white area outside of your design leaving a small tab in one corner. Take the tab and bend it until the two layers separate. Peel off the liner and discard, then trim the tab off so that your design shows no white background.
4) Place the printed transfer with the printed side up and the parchment paper on top of the transfer.
5) Set at pressure 40 psi for best results.
6) Press for 25 seconds.
7) Wait for transfer to cool, at least 2 minutes, then remove parchment paper using a smooth, even motion.
WASHING INSTRUCTIONS • Turn the garment inside out. • Wash in COLD water. • Use a mild detergent for best results. • Do not use bleach or bleach alternative detergents. • Dry on LOW temperature.
FOR BEST RESULTS • White or light pastel colored Cotton, Cotton/Polyester Blend fabric. Use fabric with tight weave. • Keep paper in original packaging until ready to use. • After opening, store unused transfer papers in a zip-lock poly bag - in a flat, cool, dry place. STEP ONE – PRINTING YOUR IMAGE 1) Bring paper to room temperature before printing. 2) Be sure to mirror or flip image prior to printing. Always pay close attention to printing. 3) Load paper so it will print on the unlined side of paper. In most copiers and printers, transfer paper can be fed from the cassette (automatic) tray as well as the bypass (manual) tray. If using the cassette tray, remove other paper from the drawer before placing the transfer paper in the copier. Fan the paper well before placing it in the cassette, this helps to minimize the static. 4) Printer settings: Settings will vary somewhat depending on the brand of copier or printer that is used. We recommend using the PLAIN PAPER setting. If the toner has not fused well then choose the next paper setting up one increment at a time. Each setting away from PLAIN PAPER slows the paper down as it goes across the fuser, choosing a setting at the other end of the spectrum could cause the paper to jam or melt if it is too hot for the paper. Find the right setting for your machine to insure great results. **Recommended print settings for these brands ONLY: HP – Print Mode: Extra Heavy OKI – Print Mode: Ultra Heavy 1 KONICA MINOLTA BIZ HUB - THICK 3
FOR BEST RESULTS
• White or light pastel colored Cotton, Cotton/Polyester
Blend fabric. Use fabric with tight weave.
• Keep paper in original packaging until ready to use.
• After opening, store unused transfer papers in a zip-lock
poly bag - in a flat, cool, dry place.
STEP ONE – PRINTING YOUR IMAGE
1) Bring paper to room temperature before printing.
2) Be sure to mirror or flip image prior to printing. Always
pay close attention to printing.
3) Load paper so it will print on the unlined side of paper.
In most copiers and printers, transfer paper can be fed
from the cassette (automatic) tray as well as the bypass (manual) tray. If using the cassette tray, remove
other paper from the drawer before placing the transfer
paper in the copier. Fan the paper well before placing it
in the cassette, this helps to minimize the static.
4) Printer settings: Settings will vary somewhat depending
on the brand of copier or printer that is used. We
recommend using the PLAIN PAPER setting. If the
toner has not fused well then choose the next paper
setting up one increment at a time. Each setting away
from PLAIN PAPER slows the paper down as it goes
across the fuser, choosing a setting at the other end of
the spectrum could cause the paper to jam or melt if it is
too hot for the paper. Find the right setting for your
machine to insure great results.
**Recommended print settings for these brands
ONLY:
HP – Print Mode: Extra Heavy
OKI – Print Mode: Ultra Heavy 1
KONICA MINOLTA BIZ HUB - THICK 3
INSTRUCTIONS:
PRINTING Iron Jet Dark Heat Transfer Paper
1) Create or select your design on your computer
2) DO NOT mirror your image or artwork.
3) Check printer settings and set to single sheet feeding.
4) Load the paper so that the image will appear on the coated side of the paper.
5) Print the design and allow it to dry.
For best results, trim away unprinted areas of the transfer as close to image as possible. Slowly peel off the backing paper from the transfer film, starting with a small tear in the corner to make separating easier. We recommend choosing a garment with a tight weave and using an image with rounded corners to avoid corner lift-off after washing.
TRANSFERRING Iron Dark Heat Transfer Paper
1) Preheat the garment for a few seconds to remove wrinkles and moisture.
2) Place the transfer on top of the garment with the image side down.
3) Cover the entire image area with a Teflon sheet if desired.
4) Press on the commercial heat press machine for 15 to 20 seconds at 375° F using heavy pressure.
5) Remove paper while still hot.
6) We recommend stretch the garment
WASHING INSTRUCTIONS
1) Preheat the garment for a few seconds to remove wrinkles and moisture.
2) Place the transfer on top of the garment with the image side up.
3) Cover the entire image area with a Parchment sheet.
4) Press on the commercial heat press machine for 15 to 30 seconds at 375° F / 175° C using heavy pressure.
For best results, allow the fabric to cool completely and Cold Peel by removing the backing paper smoothly and evenly.
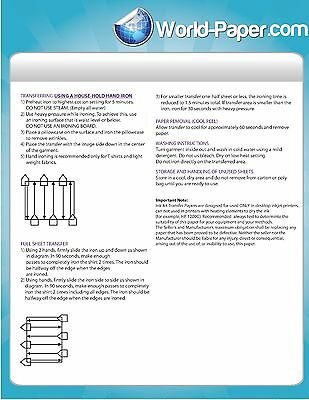
TRANSFERRING- HOUSE-HOLD IRON APPLICATION
1) Choose a very smooth hard surface at waist level or below, but do not use an ironing board.
2) Preheat the iron to the highest cotton setting for 3 minutes - do not use warm.
Do not use steam (empty all the Water)
3) Place a pillowcase on the hard surface and iron to remove any wrinkles.
4) Place the garment on the center of the pillowcase and iron to ensure flatness.
5) Place the transfer with the image facing side UP in the desired position on the garment.
6) Using two hands firmly slide the iron vertically up and down.
7) In 90 seconds, make enough passes to completely iron the shirt two times.
8) The iron should be halfway off the edge of the transfer when the edges are ironed.
9) Using two hands firmly slide the iron horizontally side to side.
10) In 90 seconds, make enough passes to completely iron the shirt two times.
11) Again, the iron should be halfway off the edge of the transfer when the edges are ironed.
*For smaller transfers one-half or less,the ironing time is reduced to ironing vertically 45 seconds and horizontally 45 seconds, if the transfer area is smaller than the iron,iron for 30 seconds whit heavy pressure.
WASHING Iron Jet Dark Heat Transfer Paper
1) Leave finished item for at least 24 hours before washing.
2) Turn garment inside out and wash in cold water using a mild detergent.
3) Do not use bleach.
4) Dry on low heat setting, do not dry clean.
5) Do not iron directly on the transferred area.
Glow-In-The-Dark Transfers are a fun way to embellish t-shirts and fabric craft projects using your computer and color inkjet printer. Use on Dark color cotton or cotton/polyester blend fabrics. This product is intended for use in standard inkjet printers only. Do not use in other printers or copiers such as laser printers or any other printer/copier that applies heat, as it may damage the machine.
INSTRUCTIONS:
PRINTING
1) Create or select your design on your computer. The white or light color parts of the design you create are the parts that will glow. The more unprinted area, the more glowing you will have.
2)Do Not Mirror the image.
3) Print the design using "best quality" and "plain paper"
4) Allow 30 minutes it to dry before transferring.
TRANSFERRING
Preheat iron to highest (cotton) setting. DO NOT USE STEAM. (Empty any water that may be in iron. Allow iron to preheat for five minutes.) Place pillowcase on smooth, hard, heat resistant ironing surface such as a wood cutting board. Do not use ironing board. Iron pillowcase, if necessary, to remove wrinkles. Pre-iron t-shirt or garment to remove any moisture and wrinkles. Position transfer image side DOWN on project surface. Using firm pressure, slowly iron over the entire transfer in a circular motion making sure that each spot of the transfer, especially edges, receives 15 to 20 seconds of heat.
Peel cold only; wait for the transfer to cool for at least two minutes and then remove the backing paper using a smooth even motion. If you would like to transfer several images on one project, it is recommended that you wait until all images are ironed before peeling away any of the paper so that the heat of the iron does not affect previously transferred images.
WASHING INSTRUCTIONS
Turn garment inside out. Machine wash in COLD water with mild detergent. Do not use bleach or bleach alternative detergents. No softener. Remove garment promptly from washer as bleeding may occur if left wet. If bleeding occurs, rewash. Tumble dry low or lay flat to dry. Do not stretch as cracking may occur. Do not iron directly on transfer. If necessary, cover with a sheet of baking parchment (available at your grocery store) and allow to cool before removing.
STORAGE
Store unused sheets in a resealable poly bag on a flat, cool and dry area
Red Grid is one of our most popular papers due to the incredible vibrancy and color retention. With an easy peel and soft hand, Red Grid is the best paper for photographs and bright artwork. Red Grid is also compatible with most cutters, including Roland GX-24. Red Grid makes professional print-and-cut applications and can be applied by hand iron or heat press.
INSTRUCTIONS:
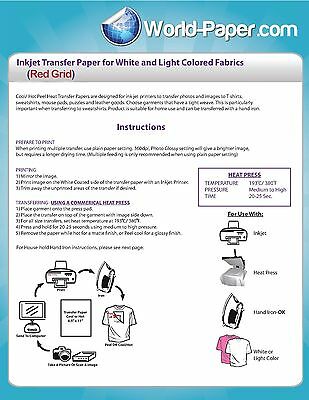
PRINTING: RED GRID TRANSFER PAPER.
1) Print on the white side of the paper.
2) Mirror/flip your before you print.
3) Check printer settings and set to single sheet feeding.
4) We recommend using the bypass tray for single-sheet feeding.
For best results, trim away unprinted areas of the transfer as close to image as possible. We recommend using an image with rounded corners to avoid corner lift-off after washing.
TRANSFERRING- HEAT PRESS APPLICATION (Recommended) RED GRID TRANSFER PAPER
1) Preheat the garment for a few seconds to remove wrinkles and moisture. Let cool.
2) Place the transfer on top of the garment with the printed side down, red grid
facing up.
3) Press on a commercial heat press machine for 20 seconds at 345-355°F
(173-180°C) using heavy pressure.
4) HOT peel. Peel the transfer immediately after pressing (Caution transfer will be hot)
TRANSFERRING- HOUSE-HOLD IRON ON APPLICATION
1) Choose a smooth, hard surface at waist level or below. You must put all of your weight into the ironing, push down as hard as you can. That is why you do not use an ironing board.
2) Preheat the iron to the highest cotton setting for 3 minutes - do not use warm. Do not use steam (empty all the Water).
3) Place a pillowcase on the hard surface and iron to remove any wrinkles.
4) Place the garment on the center of the pillowcase and iron to ensure flatness.
5) Place the transfer printed side facing down in the desired position on the garment
6) Step press with firm pressure, slowly along each side of the image. Place the iron in one spot and press that spot. Then more the iron to the next spot.
7) Hold each press for 45 seconds
8) Continue to step press over the entire image. Ensure all edges and corners are firmly pressed. Total ironing time should be 5 to 6 minutes for 8.5 x 11 size image.
9) When all areas are adhered do a quick pass with the iron to heat up the whole transfer. Peel the transfer immediately while it is still hot.
TEST APPLICATION RED GRID TRANSFER PAPER
We test each of our products thoroughly on various substrates using different transfer equipment. However, it is impossible for us to duplicate all variables using all substrates and transfer equipment. Therefore, it is essential that you test the paper prior to production using your equipment, methods, and substrate material. Heat presses very in accuracy. Conduct tests to determine the best time and temperature to use with your equipment. Please keep in mind the the seller's and manufacturer's maximum obligation shall be to replace any paper that has proven to be defective. Neither the seller nor the manufacturer shall be liable for any injury, direct or consequential, arising out of the use of, or inability to use this paper.
STORAGE
Store unused sheets in a resealable poly bag on a flat, cool and dry area
TEST APPLICATION
We thoroughly test each of our products on various substrates using different transfer equipment. However, it is impossible for us to duplicate all variables using all substrates and transfer equipment, methods and substrate materials. Heat presses vary in accuracy. Conduct tests to determine the best time and temperature to use with your equipment.
Please keep in mind the seller's and the manufacturer's maximum obligation shall be to replace any paper that has proven to be defective. Neither the seller nor the manufacturer shall be liable for any injury, direct or consequential, arising out of the use of, or inability to use this paper.
Payment
Shipping
Returns
-Paypal: This is our preferred method of payment. We accept Paypal from "Confirmed Addresses Only!” This is the fastest and most efficient way for us to process your order.
-Credit Card Payments – Visa, Master Card, Discover & AmEx - PayPal will accept your credit card even if you do not have a PayPal account. Scroll down the log-in page to find this option
-Company Checks: We do not accept company checks.
-All winning bidders must use our checkout through Paypal at the end of the auction. You can simply click on the "Pay Now" button and you will be automatically redirected to Paypal to complete the checkout process.
-We ship with the US Postal Service, UPS, DHL and will ship with motor freight as needed. All customs duties and import taxes are the responsibility of the buyer.
-Shipments are normally made within 1–2 business days of confirmed payment. You will receive a tracking number notification email on the day your item is shipped. Items requiring crating for motor freight may take longer.
-NO international shipments will be made without a tracking service. All UPS, DHL shipments do have tracking service. Some US Postal Service selections offer shipping to your country but no tracking service. If you select shipment with no tracking we will contact you with an alternative. If the increased cost with tracking service is unacceptable we will refund your purchase and terminate the transaction.
-Please do not select overnight shipping unless you have confirmed with us that we can ship that day.
-Please be aware that we observe most national holidays and therefore you may see a slight delay in processing your orders around holidays.
-If you are not 100% Satisfied with your purchase, you can return your order to our warehouse for a full refund.
-Before sending back an item for a refund or exchange, you must contact us and request an item return form.
-Once your return is received and inspected (usually within 72 hours of receipt), your refund will be processed and a credit will be automatically applied to your original method of payment within 7 days.
>Digital Design Depot Co. is an experienced and passionate group of designers, developers, project managers, writers, and artists. Every client we work with becomes a part of the team. Together we face the challenges and celebrate the victories.
Feedback is extremely important for all eBay sellers. We strive on providing the best possible experience while shopping with us. If you receive your order within a reasonable time frame, if you did not require any assistance with your purchase then we are politely asking to please leave us 5* a feedback rating. This helps us as a seller maintain high-quality service.
Before leaving negative feedback please make sure to contact us and provide info!
THE ORIGINAL WORLD OF PAPERS © 2017. All rights reserved.
